Post by Admin on Jun 8, 2014 16:50:29 GMT
I have been a fan of Karen Grubaugh's luster dipping...a few weeks ago when I discovered that she and Judy Ayers had gotten their heads together and created studies for luster techniques I just had to try the study on luster dipped ornaments. I purchased their kit and was so happy to have everything I needed included with nothing to have to add. Also included was an ornament that they had dipped as well as a blank! Their instructions included photos and are an easy step by step procedure.
To see their website where you can purchase their study kits please go to: artonporcelain.net/categories/listing/art_supplies/16
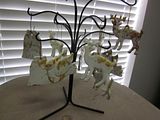
Setting up my "luster lab" I used a large coffee can lined with a plastic bag. I filled it with warm water (this is important...if the water is cold the luster just balls up and sinks to the bottom) I used the three colors in my kit...I choose the blues as that is my favorite combo. I started by putting a few drops of each color of luster in my water...then the fun began! I had some ornaments from last year that I wanted to play with. I used the included hangers to dip them...then used opened gym clips. I dipped and twirled and swung them side to side...then hung them on an ornament tree to dry. Some I really couldn't tell if much color had actually clung to them, but I decided to just see what would happen when they were fired. I knew I could always come back and re-dip them if I wanted to. I let them dry to the touch and then fired them @ cone .018.
I was so excited about the results that I ordered more ornaments and more luster! Here are just some of my results:
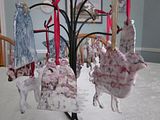
My ornaments freshly dipped and hanging out to dry

Here are the ornaments just out of the kiln...what a difference!


There really is so much that can be done with this idea. I found that dipping some of the ornaments that had MOP already fired on the surface turned out really cool! (My daughter took those for her gifts) A few of the ornaments have a space that could be used to paint roses, holly, whatever. This is just a fun and very relaxing project! >^..^<
To see their website where you can purchase their study kits please go to: artonporcelain.net/categories/listing/art_supplies/16
Setting up my "luster lab" I used a large coffee can lined with a plastic bag. I filled it with warm water (this is important...if the water is cold the luster just balls up and sinks to the bottom) I used the three colors in my kit...I choose the blues as that is my favorite combo. I started by putting a few drops of each color of luster in my water...then the fun began! I had some ornaments from last year that I wanted to play with. I used the included hangers to dip them...then used opened gym clips. I dipped and twirled and swung them side to side...then hung them on an ornament tree to dry. Some I really couldn't tell if much color had actually clung to them, but I decided to just see what would happen when they were fired. I knew I could always come back and re-dip them if I wanted to. I let them dry to the touch and then fired them @ cone .018.
I was so excited about the results that I ordered more ornaments and more luster! Here are just some of my results:
My ornaments freshly dipped and hanging out to dry


Here are the ornaments just out of the kiln...what a difference!


There really is so much that can be done with this idea. I found that dipping some of the ornaments that had MOP already fired on the surface turned out really cool! (My daughter took those for her gifts) A few of the ornaments have a space that could be used to paint roses, holly, whatever. This is just a fun and very relaxing project! >^..^<
